Saturday, September 23, 2006

Build Day 34.....Good Progress

Made some good progress today. In the morning I stripped down and cleaned up the bell housing, then in the afternoon, Gary came round and we cracked on with the chassis. Here's the progress so far:

As you can see, it's actually starting to look like something now.
Gary is a keen photographer and brought his camera round to take some shots of me at work. Here are some he took:

Sunday, September 17, 2006

Build Day 33.....More Chassis Work

It's been one of those days today where I haven't seemed to have got anywhere near as much work done as I'd planned to. Spent the morning trying to siphon the petrol out of the Rover. It had three quaters of a tank in it, and as Petrol is worth about it's weight in gold, thought I'd better remove it. Easier said than done though. Bought a length of pipe specially to do it, but couldn't get it all the way into the tank. Must be a filter or anti-siphon device in the filler pipe. In the end I managed to find the wiring to the petrol pump. Wiried it up to a battery and pumped the fuel out through the disconnected pipes under the bonnet.

In the afternoon I concentrated on doing a bit more to the chassis. Cut and shaped a number of peices to size, but have not yet got round to welding them into place - again it all seemed to take much longer than planned.

Sunday, September 10, 2006

Build Day 32.....Splitting the Rover Gearbox

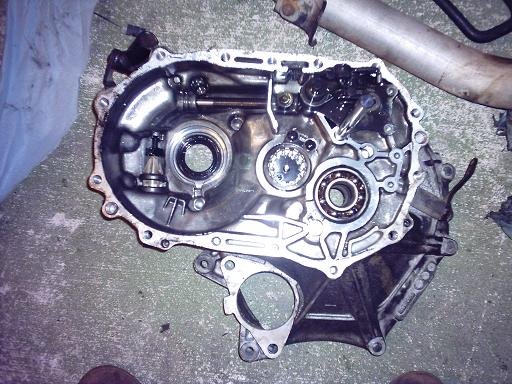
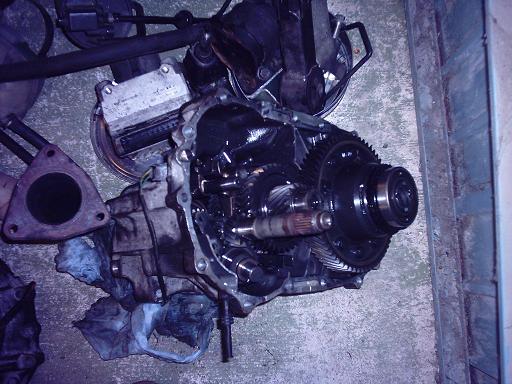
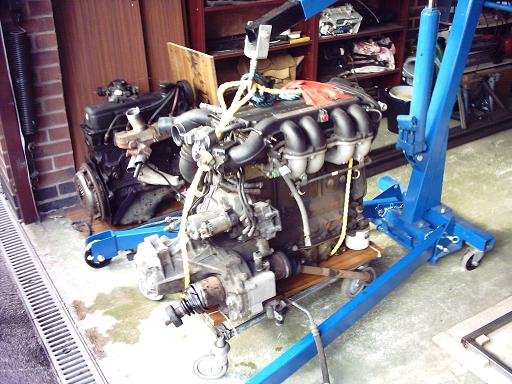
Didn't get half of what I wanted to do today. Removed the last few bits and bobs from the Rover, which is now ready to be taken to the scrapper, but then I spent the rest of my time today trying to split the Rover Gearbox apart. Basically, I want to use the bellhousing from the box to mate to the rear wheel drive Ford box, but to do this I needed to remove the back 'Gearbox' part - easier said than done. The main issue was removing the driveshafts, which according to the Haynes manual, should simply pries off with a large screwdriver - After two hours and resorting to larger and lager hammers, pry bars etc, the shafts finally came off, allowing me to do the split:


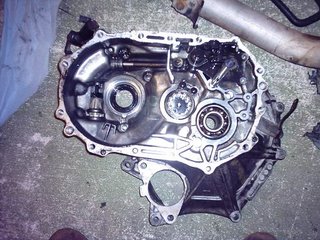
The next job here is to remove the extraneous gearbox bits from the bellhousing casting, clean it up, then start designing an adapter plate to allow the ford gearbox to mate up. I'll do some prototyping first in MDF to get the design right, then have it made up in steel plate - watch this space....

Saturday, September 09, 2006

Build Day 31.....Removing the Rover Loom

Well, it's taken most of the day, but the loom from the Rover has now been removed - and the important point is it's all in one piece and all labeled up:


Should only need a fraction of what you see here, basically the engine management part, but I wanted to get everything, just in case I miss something which, once the rover has gone, will stop me getting the engine running again.

Build Day 30.....More Stripping of the Rover

On Friday I started stripping some more required components off the Rover. First was the exhaust pipe. Won't be using all the exhaust system, but there are some useful bits which I want to keep such as various flanges and the Catalytic Converter. Next off was the steering rack, pedal assembly, brake cylinder and servo and the clutch cylinder.

I then turned my attention to the wiring loom. Unlike when I stripped the Sierra, I want to remove the Rover loom complete and undamaged (with all the relevant connectors labeled up). This is so I ensure that I have all the required wiring for the engine management system.

I made a start, but will have to spend a lot more time on this on Saturday.

Build Day 29.....Removing extraneous Engine Components

On Thursday I removed the other extraneous components from the engine that are not required. These included the Power Steering pump and Air Conditioning compressor.

The Rover T-Series engine comes from a long line of Rover 2lt units, each with incremental design changes and can all be traced back to the 'B-series'. As a result, although the T-Series was mounted transversely, the block still has mount points to allow it to be mounted longitudinally as is required in the Locost. Unfortunately, there is a little subframe that holds the water pump and alternator which uses one of these mount points. This subframe had to go as well, but I'll of course still need a water pump and alternator. The water pump will be replaced by a special electric one and the alternator will be moved round to the other side of the block (where there are some other mounting points for this purpose dating from the older engines).

Sorted....Hopefully.

Monday, September 04, 2006

Build Day 28.....Removing Rover Gearbox

Just spent a couple of hours tonight in the garage. Removed the gearbox from the Rover engine and had a good look at the flywheel, clutch mechanism and bell housing to see if it's possible to mate up a ford gearbox. The two obvious hurdles are that firstly the centre of the clutch plate does not have the correct number of teeth as to fit on a ford gearbox input shaft (although the diameter is the same). Secondly, there is no spigot bearing in the crankshaft (although a hole exists where one could be fitted). I will have to do some research to see if I can source parts to fit.

Sunday, September 03, 2006

Build Day 27.....It's Out - Finally!!

Well, after a lot of swearing and yet more grinding (thanks Keith for the cutting disc - worked a treat) I finally lifted the engine out of the Rover today:


Saturday, September 02, 2006

Build Day 26.....More Chassis Work

Unfortunatly my plan to remove the Rover engine was rained off today. Instead, I spent some more time on the chassis. Here's the progress so far: